Windows server 2019 installing steps
Page 1 – Setup Preferences
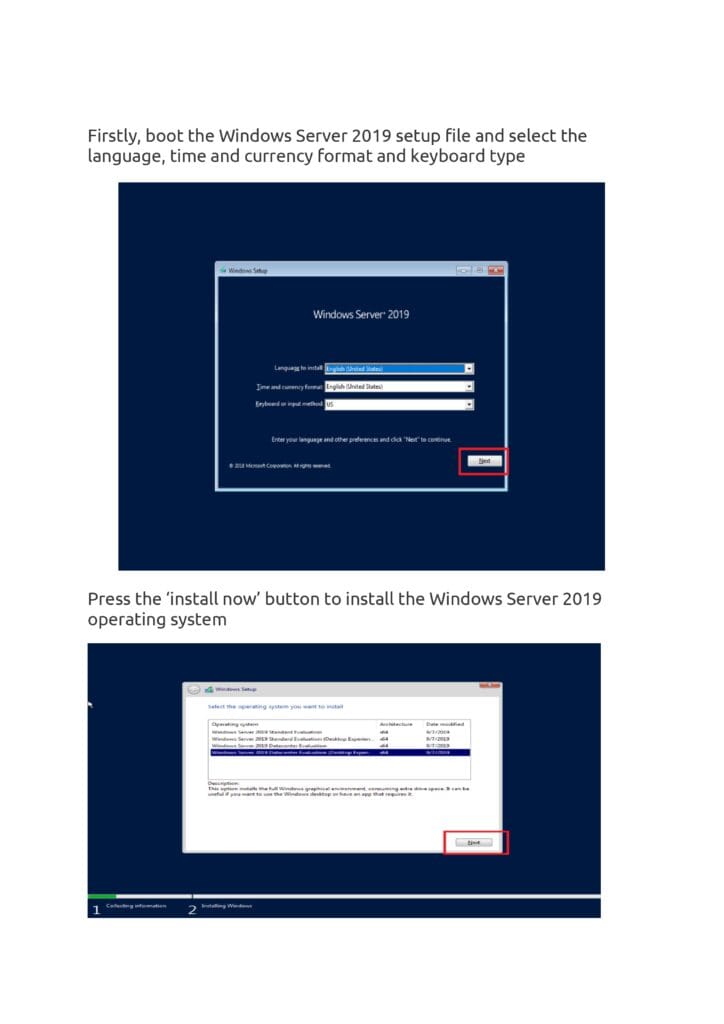
Boot from the Windows Server 2019 setup file.
Select language, time and currency format, and keyboard type.
- Click Next to continue.
Page 2 – Install Now & Edition Selection
Press Install Now.
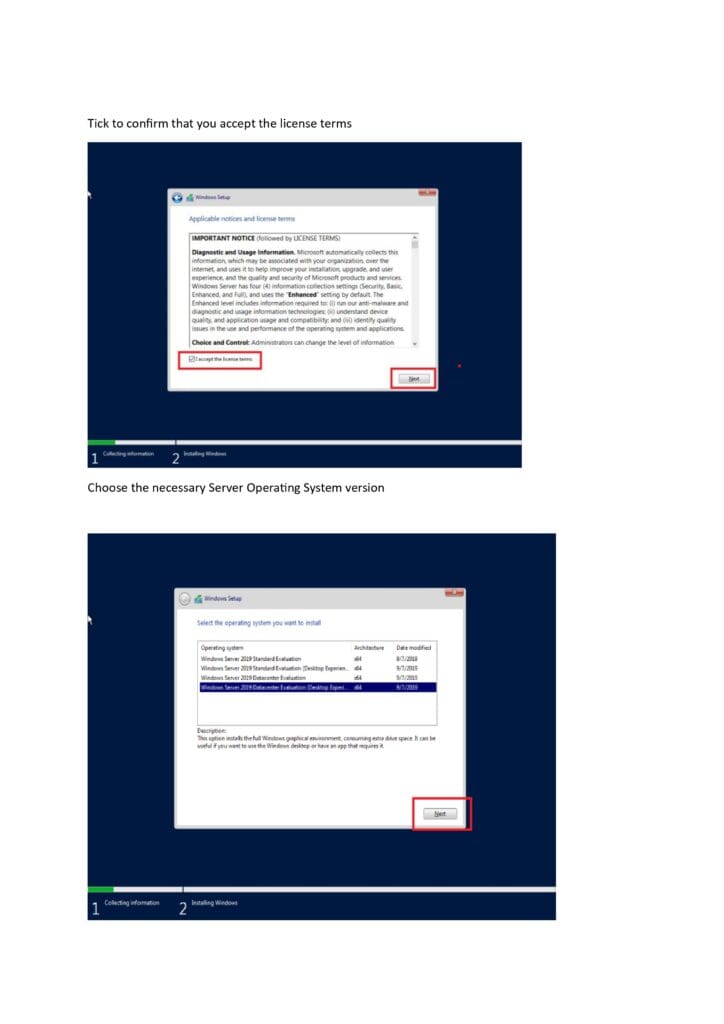
Choose the edition to install:
Standard Evaluation (Core or Desktop Experience).
Datacenter Evaluation (Core or Desktop Experience).
Desktop Experience includes the full graphical interface.
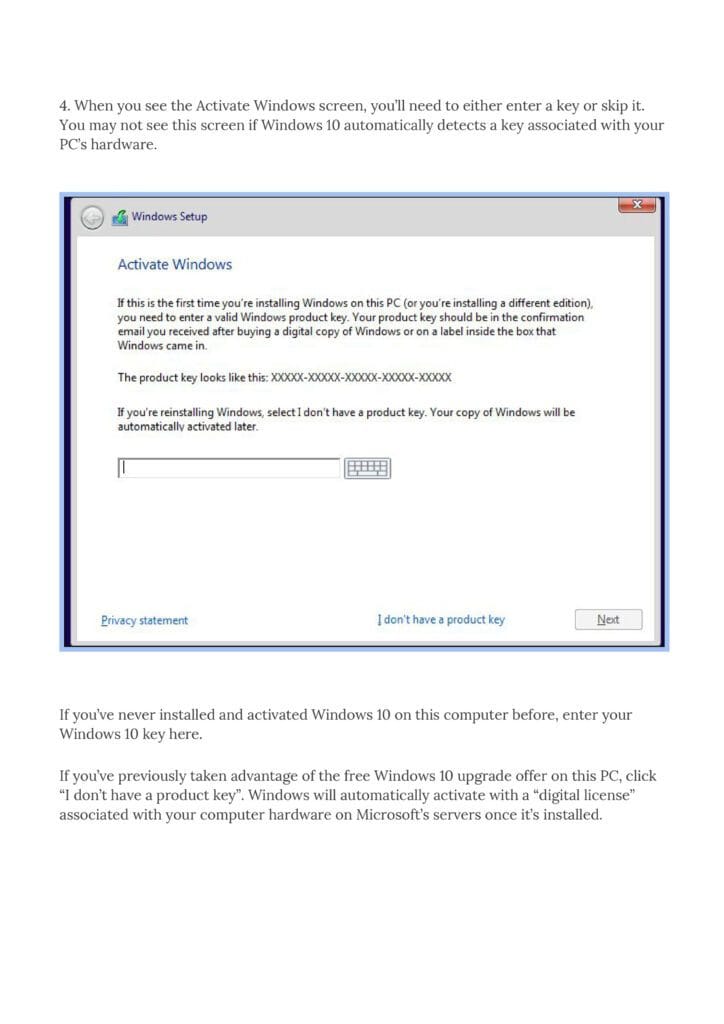
Page 3 – License Terms
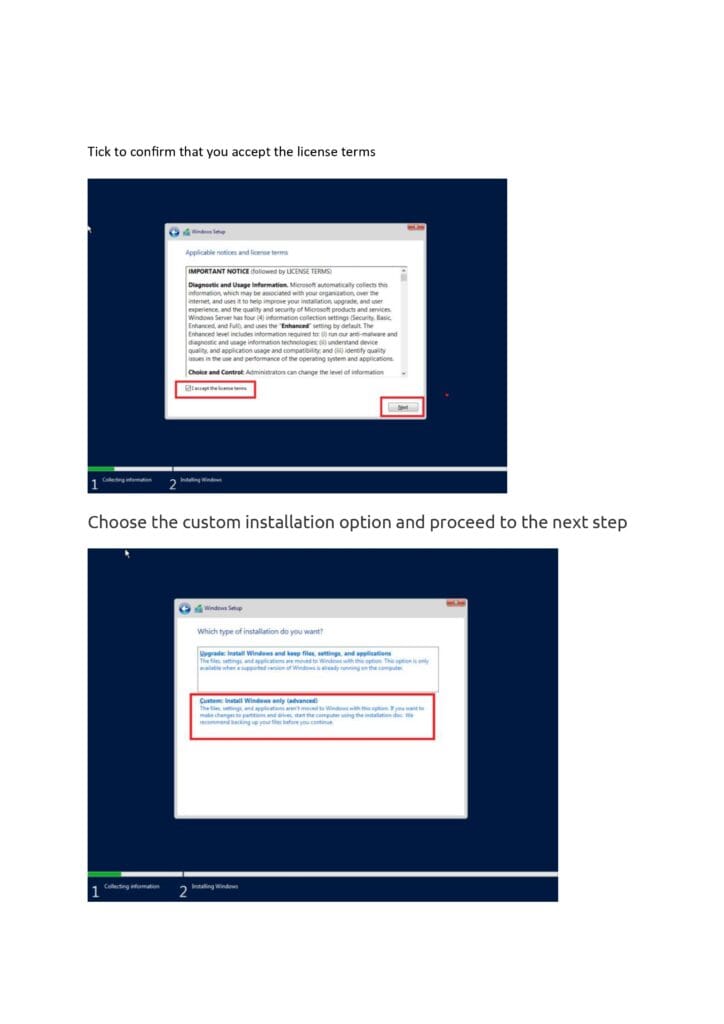
Review Microsoft’s license agreement.
Tick “I accept the license terms” to proceed.
Note: Administrators can later adjust diagnostic data collection levels (Security, Basic, Enhanced, Full).

Page 4 – Installation Type
Choose between:
Upgrade: Keeps files, settings, and applications (only if upgrading from a supported version).
Custom (Advanced): Fresh installation, allows partition changes. Recommended for new installs.
Page 5 – Partition Selection
Create or select a partition for installation.
Options: Delete, Format, New, Extend, or Load driver.
Click Next to begin installation.
Page 6 – Installation Progress & Restart
Installation steps:
Copying Windows files.
Getting files ready.
Installing features.
Installing updates.
Finishing up.
System restarts automatically (or you can force restart).
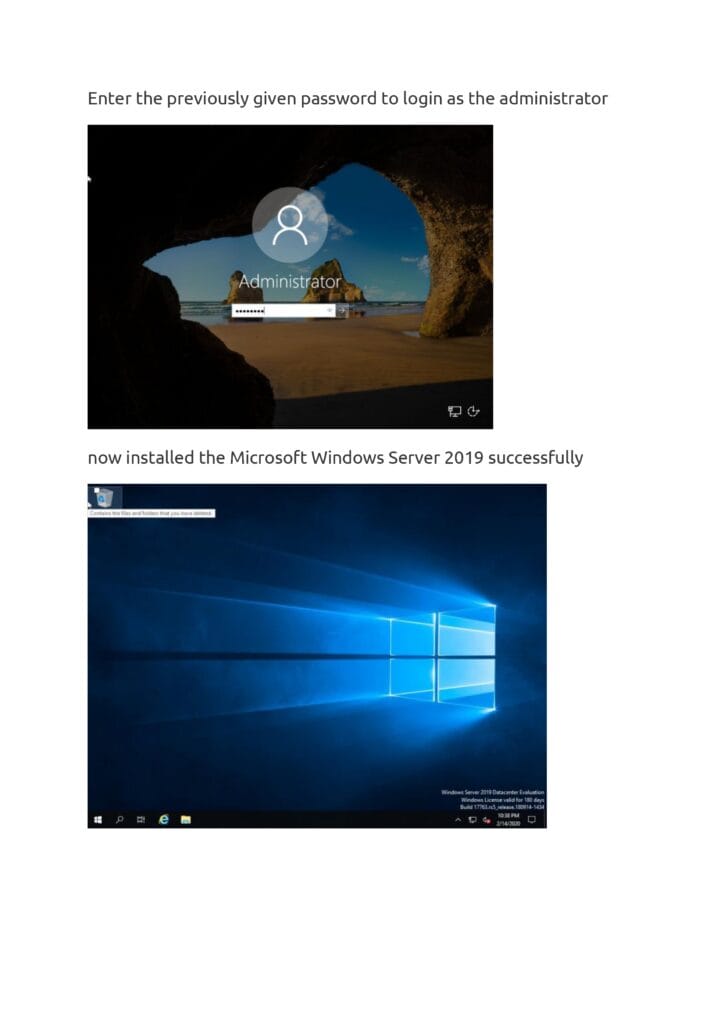
Page 7 – Administrator Setup & Login
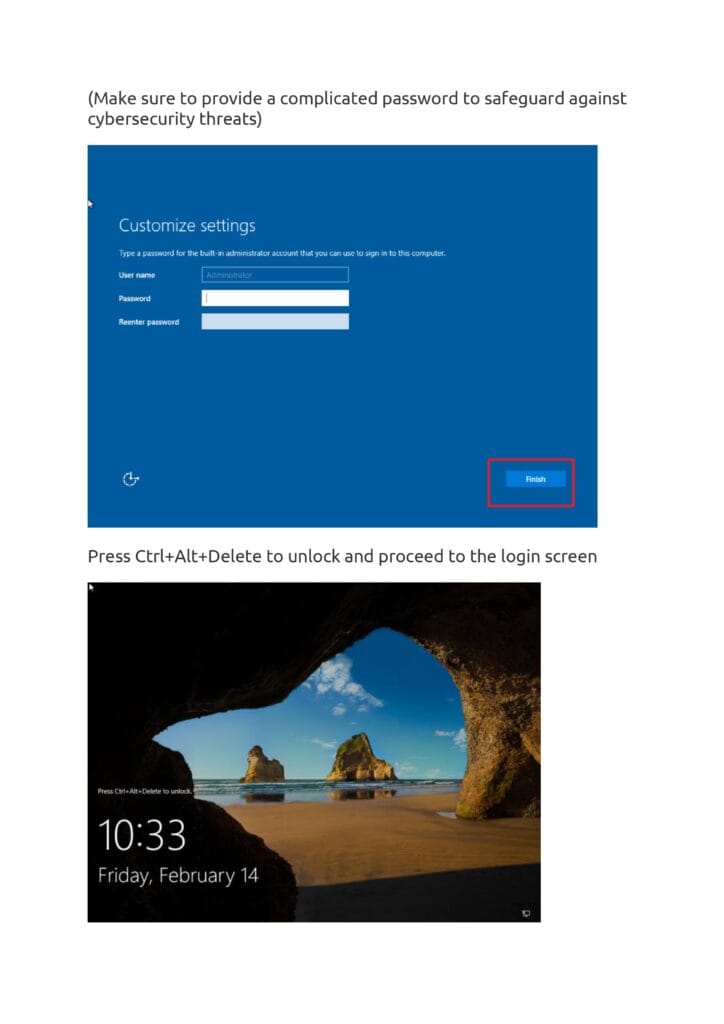
Set a strong password for the local Administrator account.
Press Ctrl+Alt+Delete to unlock.
Enter the Administrator password to log in.
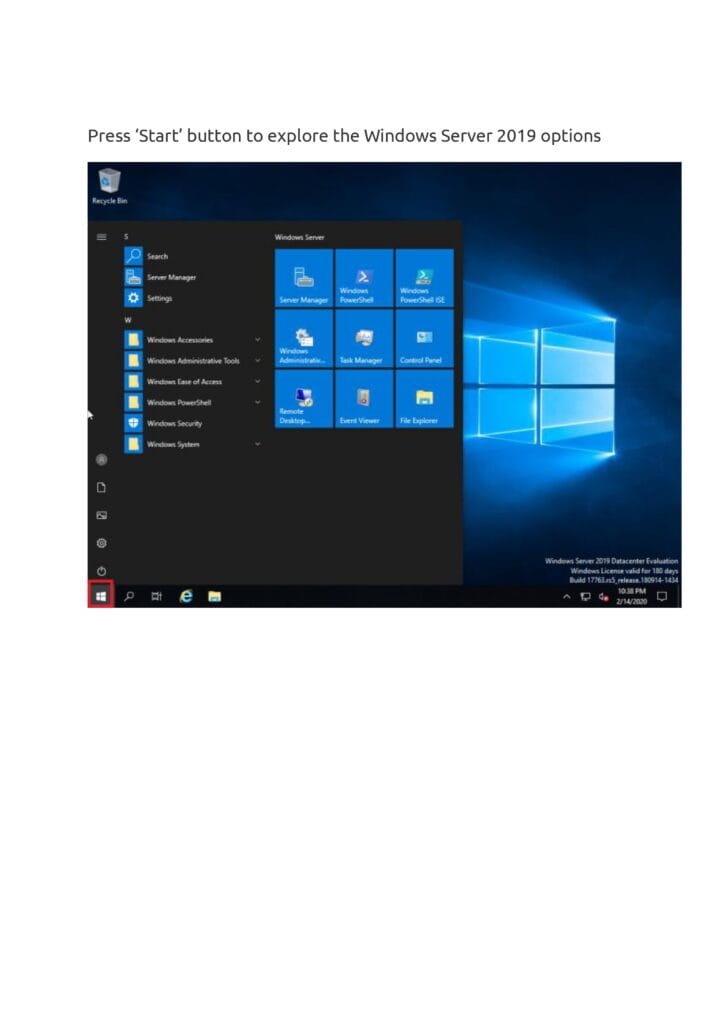
Page 8 – Successful Installation & Start Menu
Windows Server 2019 is now installed.
Shows Datacenter Evaluation edition, valid for 180 days.
Build version: 17763.rs5_release.180914-1434.
Access tools via Start Menu: Server Manager, PowerShell, Administrative Tools, Control Panel, etc.