Windows 10 OS installing steps
Page 1 – Preparing Installation Media
- Lists requirements: internet connection, storage space, blank USB (8GB+) or DVD.
- Warns that all content on the USB/DVD will be erased.
- Notes that large ISO files may need a Dual Layer DVD.
Page 2 – PC Checks
- Check if your CPU is 32-bit or 64-bit.
- Confirm your PC meets Windows 10 system requiremaents.
- Advises visiting the manufacturer’s site for drivers and compatibility.
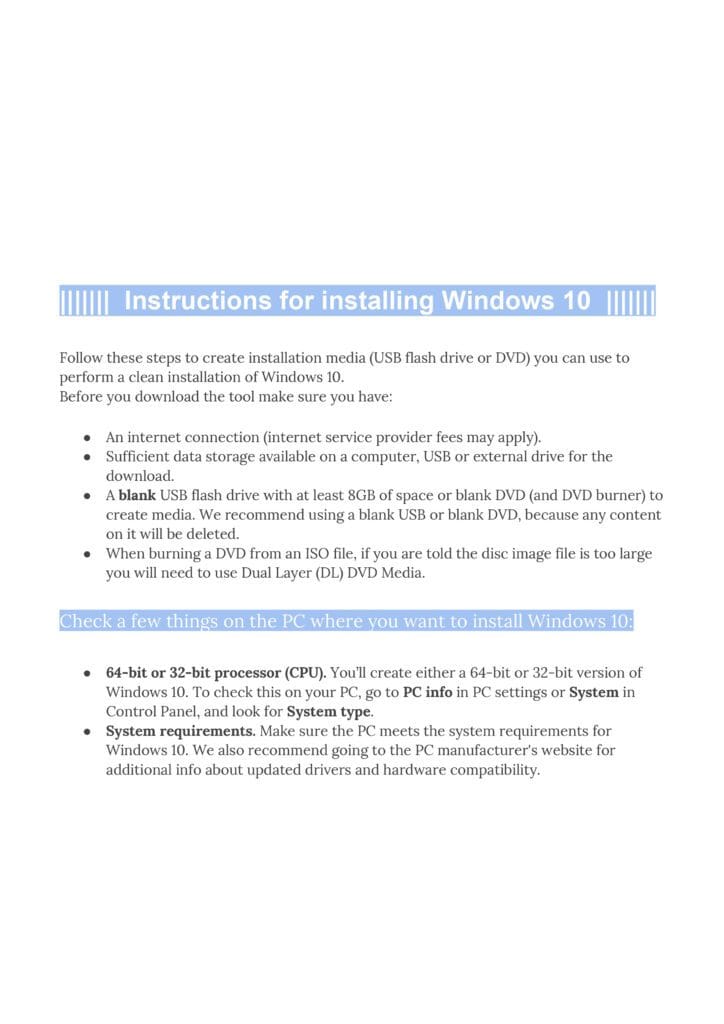
Page 3 – Downloading the Tool
- Download and run the Media Creation Tool as administrator.
- Accept license terms.
- Choose Create installation media for another PC.
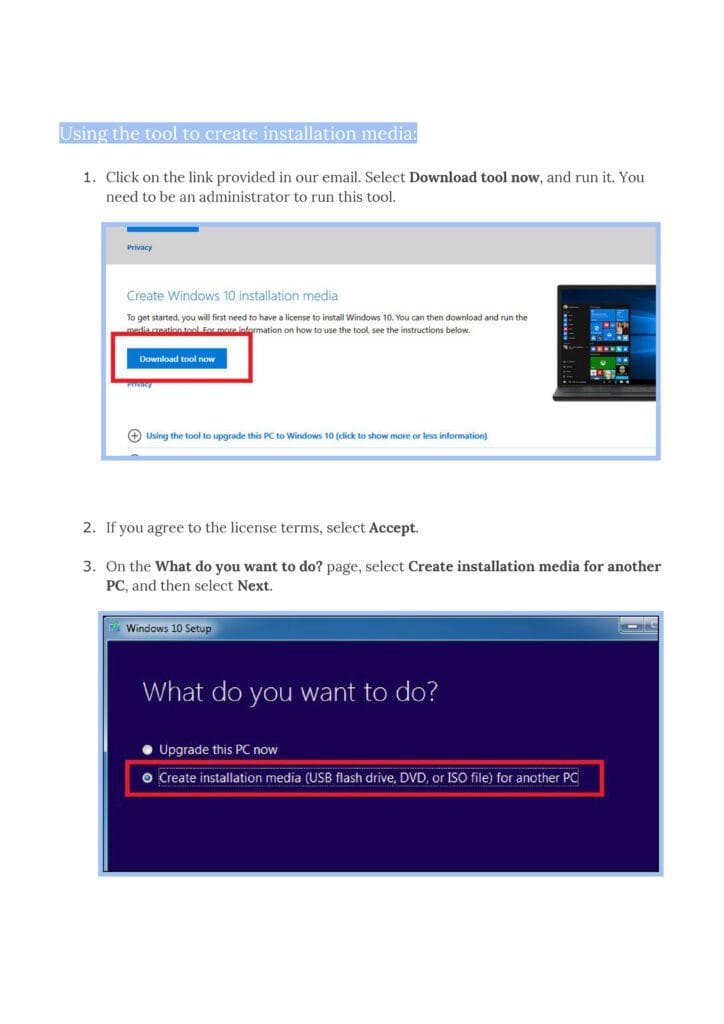
Page 4 – Language, Edition, Architecture
- Select language, edition, and architecture (32-bit or 64-bit).
- Option to use recommended settings for your PC.
Page 5 – Media Choice
- Choose between:
- USB flash drive (minimum 8GB, data erased).
- ISO file (burn later to DVD).
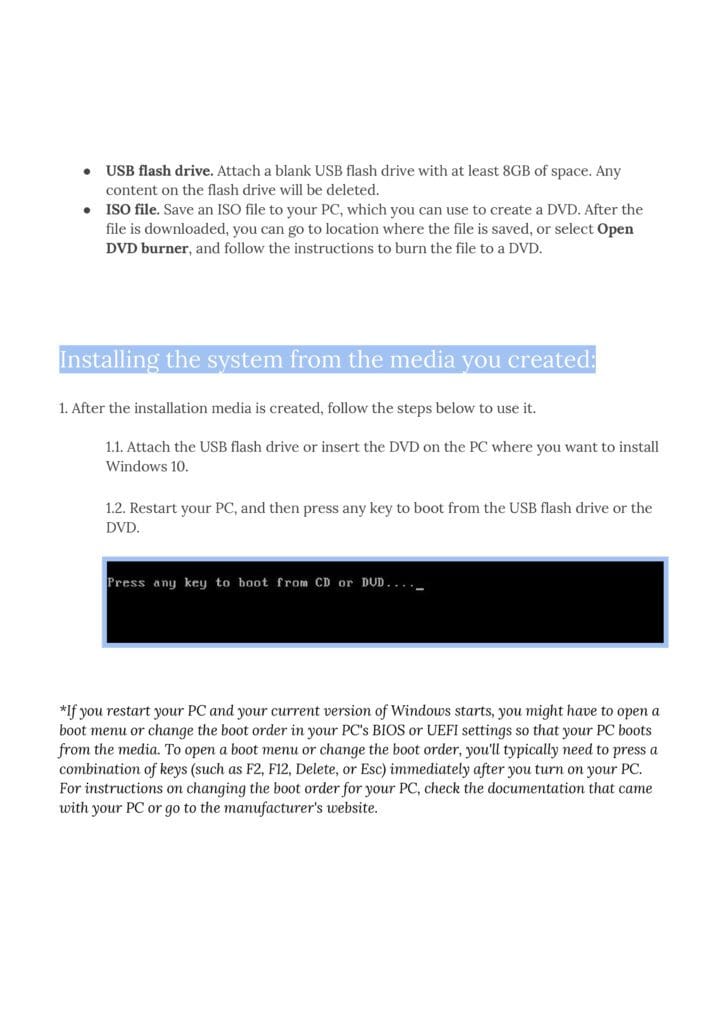
Page 6 – Booting from Media
- Insert USB/DVD into target PC.
- Restart and boot from media.
- If Windows loads instead, adjust boot order in BIOS/UEFI (keys like F2, F12, Delete, Esc).
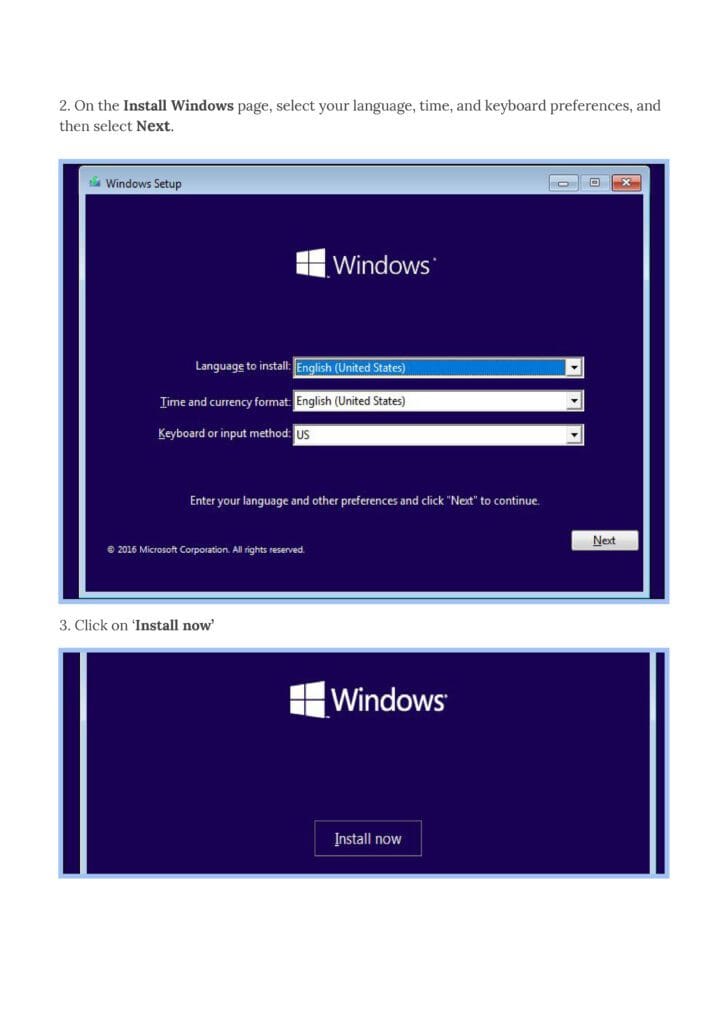
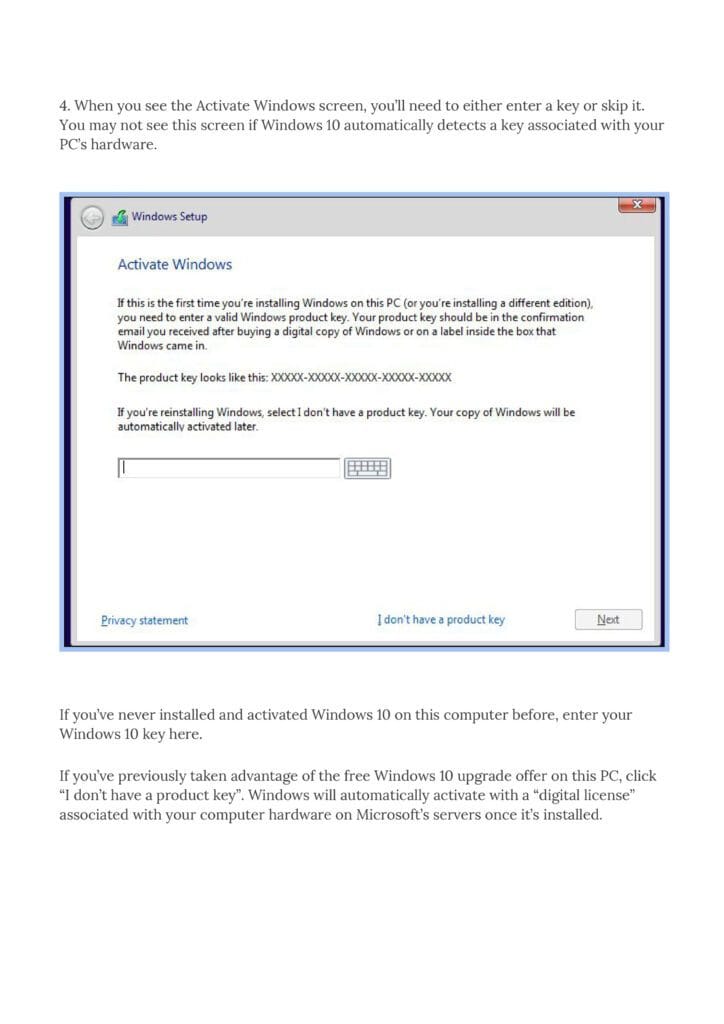
Page 7 – Setup Start
- Select language, time, and keyboard preferences.
- Click Next, then Install now.
- Enter product key or skip if digital license is detected.
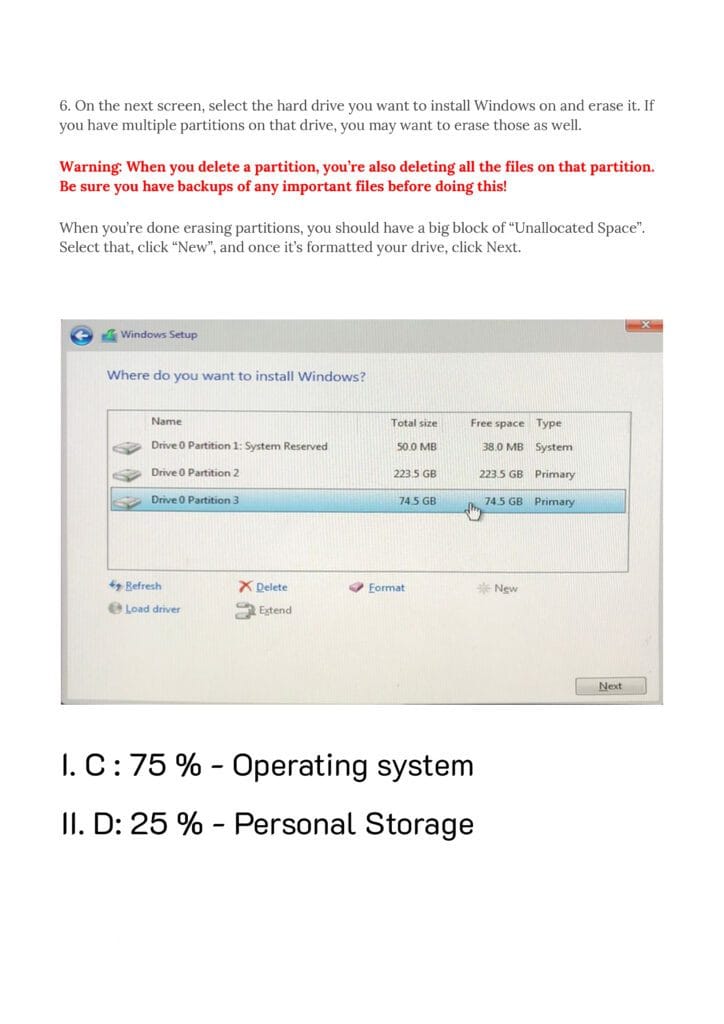
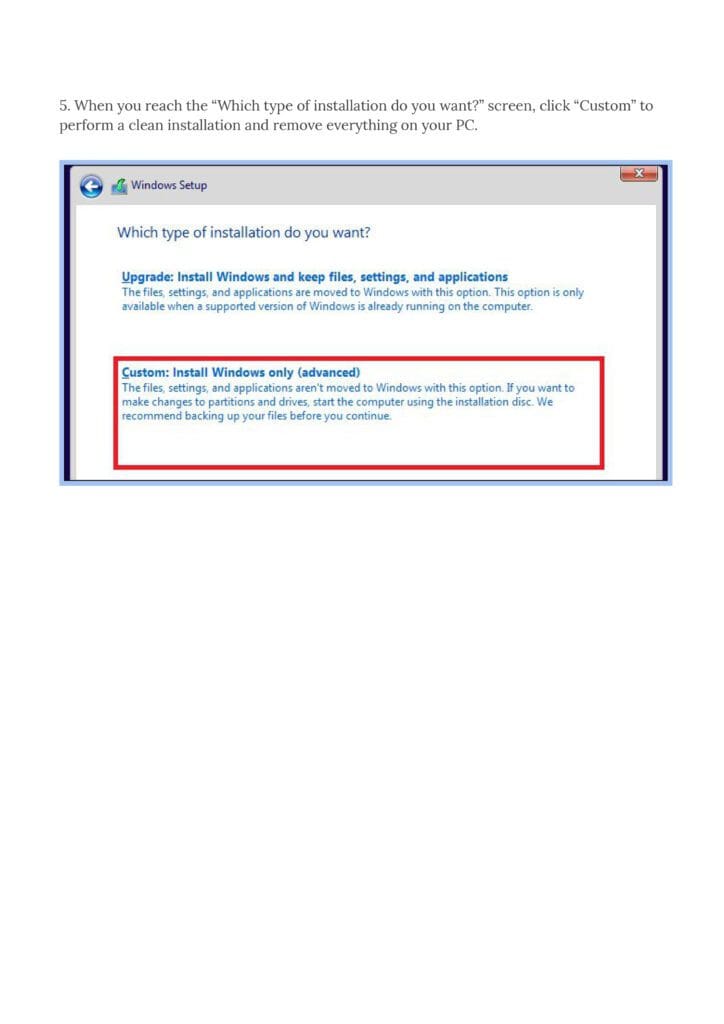
Page 8 – Installation Type & Drive Selection
- Choose Custom: Install Windows only (advanced) for a clean install.
- Select the drive/partition, delete partitions if needed → creates Unallocated Space.
- Format and click Next.
- ⚠️ Warning: Deleting partitions erases all files.

Page 9 – Installation Process & Final Steps
- Windows installs, restarts several times.
- After installation, set up user accounts and preferences.
- Install latest drivers for full compatibility.